Saturday, October 29, 2011

Double Chocolate Brownies..

I have a confession. I have never made brownies from scratch. Nope. It's always been from a box. I think it's because I'm not too big of a brownie fan and never had the urge to make it from scratch...and the box kind is good enough. :) But, little did I know, brownies from scratch is quite simple. Just a few ingredients. Since I'm going to have a booth at a bridal show this Sunday, I thought I'd make some. And try out a new silicon brownie mold that I recently bought to see how it works out! It makes this cute little squares. I got this recipe from my Martha Stewart Cookies book.

Oh, and as I was buying her cakestands at Macy's yesterday, I found out that Martha Stewart is making an appearance at South Coast Plaza Macy's Home Store the beginning of next month! I was soooo excited, yes, terrible, since she's a con artist and been in prison and all..but secretly I think she's ingenious and aspire to be just like her. :) But I was crushed to learn that she's going to be here as I'm leaving for NYC. Ugh! just wasn't meant to be I guess...

so the brownies...

Ingredients for Double Chocolate Brownies


-6 tablespoons unsalted butter, plus more for pan
-6 ounces coarsely chopped good-quality semisweet chocolate
-1/4 cup unsweetened cocoa powder (not Dutch-process)
-3/4 cup all-purpose flour
-1/4 teaspoon baking powder
-1/4 teaspoon salt
-1 cup sugar
-2 large eggs
-2 teaspoons pure vanilla extract

Preheat oven to 350 degrees. Line a buttered 8-inch square baking pan with foil or parchment paper, allowing 2 inches to hang over sides. Butter lining (excluding overhang); set pan aside. (I used my silicon mold..)

Put butter, chocolate, and cocoa in a heatproof medium bowl set over a pan of simmering water; stir until butter and chocolate are melted. Let cool slightly. (I melted everything in the microwave..works just as good!)


Whisk together flour, baking powder, and salt in a separate bowl; set aside.

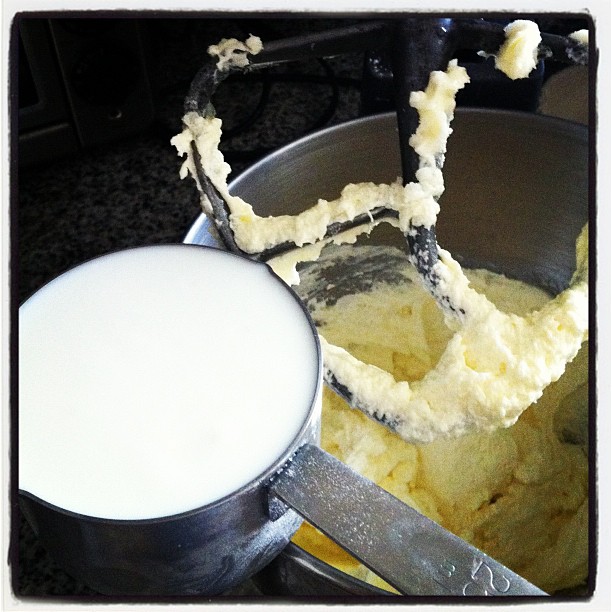
Put sugar, eggs, and vanilla in the bowl of an electric mixer fitted with the whisk attachment, and beat on medium speed until pale, about 4 minutes. Add chocolate mixture; beat until combined. Add flour mixture; beat, scraping down sides of bowl, until well incorporated.


Pour batter into prepared pan; smooth top with a rubber spatula.


(I had to smooth the tops down after the second batch, otherwise, it bakes and turns out as it, all lumpy, still tastes good but doesn't look as good..)

Bake until a cake tester inserted into brownies (avoid center and edges) comes out with a few crumbs but is not wet, about 35 minutes. Let cool slightly in pan, about 15 minutes. Lift out brownies; let cool completely on a wire rack before cutting into squares.

My first batch I baked 30 minutes and the brownies was overbaked. The second batch I baked about 25 minutes in my silicon mold (I have never used silicon before haha) and they turned out crunchy on top and chewy and cakey in the middle. Perfect! Enjoy!!!


aren't the little cubes cute?? :)

Thursday, October 27, 2011

Cookies and Cream (oreo) Cupakes

I had leftover oreos from the mummy lollipops so I looked up a recipe for Cookies and Cream cupcakes. I think it's funny that they're called this because really, the cupcake itself is just a chocolate cake, with an oreo in it, and the frosting has crumbled oreos in it. When I thought of cookies and cream cupcakes, I thought the cake would be, like the ice cream. Hahaha. But I guess, how would you make that? I went with a recipe from the Bakerella website, the originator of the cake pops. To tell you the truth, I'm a visual person..like when buying products, I don't look at what it can do, or the price, but I'm drawn to products that I think are pretty or look nice. Same goes with recipes. I pick the ones that have the best pictures. hahaha. Yes, I also try to compare recipes, but mostly against other recipes with pretty pictures. Yes, I discriminate. Yes, I am bias. I only hope that mine will turn out just as pretty. Is that so wrong?? :)

To start, preheat oven to 350 degrees. Line two 12 count cupcake pans. Place one whole cookie in each cup or break apart at least 12 cookies and place the broken pieces into each cup. I made mine with the whole cookies. I like the way the whole cookie rises to the top of the batter as it bakes.


Mix the flour, cocoa, sugar, baking soda, baking powder and salt in a large mixing bowl using a wire whisk. Add the eggs, oil, vanilla and milk and mix well until thoroughly combined. Add the hot water and mix until combined.


Transfer the batter (it will be very liquid) to a large measuring cup and then pour batter into each baking cup so it’s about three quarters full (I did 3/4 full but the batter doesn't rise too much, so I suggest just a tad bit more than 3/4 so that the cupcake can rise to the rise for the perfect cupcake).


Bake for 16-18 minutes. the recipe says it makes at least 12 cupcakes but I made 24.

Ingredients for Cupcakes:
1 1/2 cups all purpose flour
1/2 cup natural unsweetened cocoa
1 1/4 cup sugar
3/4 teaspoon baking soda
1/2 teaspoon baking powder
1/2 teaspoon salt
2 eggs
1/2 cup vegetable oil
1 teaspoon vanilla
3/4 cup milk
3/4 cup hot water
24 Oreos, plus more for crumbs

The frosting used is a shortening base instead of a regular buttercream because with shortening, it keeps it whiter so that the specks of the crumbled oreos in the frosting stands out more.

Ingredients for Frosting

1 cup shortening
1 lb. powdered sugar
1 teaspoon vanilla
3-6 Tablespoons milk
2 or more teaspoons Oreo cookie crumbs

Beat the shortening in a mixer until smooth. Add vanilla and mix until combined.
Add the powdered sugar in three additions, scraping down the sides after each addition. Add a Tablespoon of milk at a time and mix together until you achieve the consistency you like. (I used about 5 tbsp) Add the cookie crumbs and mix until completely combined.


Place frosting in a decorator bag with a 1M tip and swirl on top of each cupcake. Insert a cookie on top of each cupcake.


I think they turned out pretty cute! :) It's a good tasting cupcake too! Enjoy!

Tuesday, October 25, 2011

Banana Walnut Bread

I love using my over ripe bananas to make banana bread. It's yummy, better than brown, mushy bananas..you really can't eat those on its own. I've made banana bread before, from a recipe off of the internet that was delicious-moist and full of banana flavor. So I've kept that recipe and used it over and over.

So today, there were three overly riped bananas on my counter. But my BF and I argued over using my original recipe. Because it used sour cream in it. He hates sour cream. But then again, he hates cream cheese, butter, anything creamy or saucy or any beef or pork and he's allergic to crab and lobster. Oops, off topic. :) So anyways. I had to find another recipe..this one came from the Food Network website from their own kitchen. Let's see how this compares to the sour cream version!! I'm skeptical but, compromises right? :P

Preheat oven to 350 degrees F.

Sift the flour, baking soda, and salt into a medium bowl, set aside.


Whisk the eggs and vanilla together in another bowl set aside. Lightly brush a 9 by 5 by 3-inch loaf pan with butter.


In a standing mixer fitted with the paddle attachment or with an electric hand-held mixer, cream the butter and sugar until light and fluffy. Gradually pour the egg mixture into the butter while mixing until incorporated. Add the bananas,


(the mixture will appear to be curdled, so don't worry), and remove the bowl from the mixer.


With a rubber spatula, mix in the flour mixture until just incorporated. Fold in the nuts.


Transfer the batter to the prepared pan.


Bake for 55 minutes or until a toothpick inserted into the center of the bread comes out clean. Cool the bread in the pan on a wire rack for 5 minutes. Turn the bread out of the pan and let cool completely on the rack.


It turned out pretty good. :) I think the sour cream makes it just a bit more moist, but to have it a little healthier, I guess I can do with this version. enjoy!!

Ingredients

-1 1/4 cups unbleached all-purpose flour
-1 teaspoon baking soda
-1/2 teaspoon fine salt
-2 large eggs, at room temperature
-1/2 teaspoon vanilla extract
-1/2 cup unsalted butter, at room temperature, plus more for preparing the pan
-1 cup sugar
-3 very ripe bananas, peeled, and mashed with a fork (about 1 cup)
-1/2 cup toasted walnut pieces

Friday, October 21, 2011

Red Velvet Cupcakes

I've only made red velvet cupcakes from scratch like once...back when I lived with my parents...so that was quite a long time ago. And I don't remember it being that great. But then again, I didn't have a mixer, I don't know where I got the recipe from, and...I don't even remember. Hahah. I had bought some cream cheese for some cream cheese frosting for the lemon cake that I made, but ended up using a buttercream frosting instead. So, I needed to make something else that used cream cheese so I don't waste it. Red velvet is actually my favorite flavor at Sprinkles. Hope these taste just as delicious! This recipe is from my Martha Stewart's Cupcake book..I looked up on the internet a bunch of recipes, usually to look at the difference in ingredients and I found that this recipe does not have any butter and uses a distilled white vinegar instead of cider vinegar which other recipes do. I'm not sure how the difference affects end product so perhaps I'll have to make red velvet cupcakes again using a different recipe and see how they taste and turn out! sorry I'm a horrible writer, I have horrible run on sentences..forgive me..that's why I like to beat people up normally and bake on the side, and not a writer :)

Preheat Oven to 350 degrees F. Line standard muffin tins with paper liners. Whisk together cake flour, cocoa and salt in a bowl.


With electric mixer on medium speed, whisk together sugar and oil until combined. Add eggs, one at a time beating until each is incorporated, scraping down the sides of the bowl if necessary.


Mix in food color and vanilla.


Look at the pretty color!

Reduce speed to low. Add flour mixture in three batches, alternating with two additions of buttermilk and whisking well after each. Stir together the baking soda and vinegar in a small bowl (it will foam), add to the batter and mix on medium speed 10 seconds.


Divide batter evenly among lined cups, filling each with 3/4 full.


Bake, rotating tins halfway, until a cake tester inserted in centers comes out clean, about 20 minutes. Transfer tins to wire racks to cool completely before removing cupcakes.


Red velvet is using accompanied by a cream cheese frosting. I used the recipe from the same Martha Stewart's Cupcake book.


I piped the frosting using a piping bag and a large round tip. Then I threw some red sugar crystals on it. It all turned out better than I thought. And it's delicious!! Super moist!!!! YYAYERRRRR!!! Look!


This recipe makes 24 cupcakes. Enjoy!

Ingredients for Red Velvet Cupcakes
-2 1/2 cups cake flour, sifted
-2 tablespoons unsweetened Dutch-process cocoa powder
-1 teaspoon salt
-1 1/2 cups sugar
-1 1/2 cups vegetable oil
-2 large eggs, room temperature
-1/2 teaspoon red gel paste food color
-1 teaspoon pure vanilla extract
-1 cup buttermilk
-1 1/2 teaspoons baking soda
-2 teaspoon distilled white vinegar

Ingredients for Cream Cheese Frosting
-1 cup (2 sticks) unsalted butter, room temperature
-12 ounces cream cheese, room temperature
-1 pound (4 cups) confectioners' sugar, sifted
-3/4 teaspoon pure vanilla extract

with an electric mixer on medium high speed, beat butter and cream cheese until fluffy. Reduce speed to low. Add sugar, 1/2 cup at a time, then vanilla and mix until smooth and combined, scraping down sides of bowl if needed. Use immediately, if not, can be stored refrigerated up to 3 days in airtight container. Before using, bring to room temperature and beat on low speed until smooth again.

Wednesday, October 19, 2011

Mummies!!

I saw these on a website and had to make them too. :) all you need is a pack of oreos, lollipop sticks, white chocolate wafers and some eyes.

For some reason, these eyes are hard to find!!! I went to my go to supply store in Buena Park, Calico Cake Shop, but they ran out. Then I went to my back up store ABC Cake Shop in Orange but they didn't even have any. All they had were the Wilton monster eyes, which are too big. So on the way to dropping off my BF at the airport, I found this other cake shop called Gloria's in Culver City. and I found these


perfect!! I used 6" lollipop sticks and stuck them into the oreos.


Then dip the cookies into the melted white chocolate. The chocolate that I got (Wilton's wafers) was not too smooth when I melted it to dip (the cookies kept falling apart off the stick) so instead of dipping, I scooped the chocolate into a piping bag and directly piped the ribbons of chocolate onto the cookie. But first, use some melted chocolate to stick two eyes onto the oreo. Then start piping..


It's easy!


Hhahaha! I love it! You can also bag them up to give away!! I found a use for this spool of orange ribbon that I bought for a friend's bridal shower! :)


enjoy!!

Monday, October 17, 2011

Snickerdoodles

My BF is leaving town tomorrow so I thought I'd make him his favorite cookies...well, his favorite so far out of all the ones I've baked so far. :) This recipe has few ingredients and super easy. This recipe is from my Martha Stewart Cookie Book.

Here goes, preheat oven to 350 degrees F. Sift together flour, baking powder and salt in a bowl.


Put butter and 1 1/2 cups of sugar in the mixer with paddle attachment. Mix on medium speed until fluffy, about three minutes. Mix in eggs. Reduce speed to low. Gradually mix in flour mixure.


Stir together cinnamon and remaining 2 tbs sugar in a small bowl.


Shape dough into 1 1/4" balls, roll in cinnamon sugar. Space 3 inches apart on baking sheets lined with parchment paper.


Bake cookies, rotating sheets halfway through, until edges are golden brown, 12-15 minutes. Let cool on sheets on wire racks. Makes about 1.5 dozen!


Ingredients for Snickerdoodles
-2 3/4 cupes all purpose flour
-2 teaspoons baking powder
-1/2 teaspoon coarse salt
-1 cup (2 sticks) unsalted butter, room temperature
-1 1/2 cups plus 2 tablespoons sugar
-2 large eggs
-2 teaspoons ground cinnamon

Enjoy!

Lemon cake with Lemon Buttercream

My sister asked for lemon cake. I thought, this could be the perfect opportunity to make my first layered cake! I've only been baking cupcakes and cookies, so...we will see how this turns out!!! I looked up on the internet for recipe and came across Martha Stewart's Lemon Cake with a whipped frosting.

http://www.marthastewart.com/632498/lemon-cake?czone=food/cake-center/favorite-cake-recipes

It looks beautiful in the picture, so here goes!

Preheat oven to 350 degrees F. Butter and flour two 8-by-2-inch cake pans, tapping out excess flour. In a medium bowl, whisk flour, baking powder, baking soda, salt, and lemon zest.


In a large bowl, using an electric mixer, beat butter and 1 1/2 cups sugar until light and fluffy. With mixer on low, beat in eggs and yolks, one at a time. Beat in 2 tablespoons lemon juice. Alternately beat in flour mixture and buttermilk beginning and ending with flour mixture; mix just until combined.


I bought these two 8x2" aluminum pans from Michaels. Dont' forget your 40% off coupon! (or 50% :D)

Divide batter between pans; smooth tops.


Bake until cakes pull away from sides of pans, 32 to 35 minutes. Let cool in pans 10 minutes. Run a knife around edges of pans and invert cakes onto a wire rack.

While cakes are baking, bring remaining 1/2 cup sugar and 1/2 cup water to a boil in a saucepan. Add lemon slices and simmer 25 minutes. Using a slotted spoon, transfer lemon slices to a waxed-paper-lined plate. Stir remaining 1/4 cup fresh lemon juice into syrup.


Using a toothpick, poke holes in warm cakes on rack. Brush with lemon syrup. Let cool completely. Prepare frosting, substituting 2 tablespoons fresh lemon juice for vanilla extract. Frost cooled cakes and top with candied lemon slices.


For the frosting, I thought I'd try the whipped frosting that Martha Stewart used with her cake and see how that turns out. http://www.marthastewart.com/341535/whipped-frosting

It uses raw egg whites which I'm not too fond of, but proceeded anyways. I didn't have a double boiler so I improvised with a pot and another bowl. I was beating my lil (or err big) butt off, to keep the egg whites from cooking but I think my heat was still too high and some of it did cool. There were little bits of egg whites floating around when I was done, but I drained it, stuck it in the mixer and let it whip away. It actually turned out really nice. Except I didn't like it. It was airy and fluffy, but I think the cake should have something thicker like a buttercream or cream cheese frosting.


So I nixed that and used a simple Lemon Buttercream frosting recipe:

-3 1/2 cups confectioners sugar shopping list
-1/2 cup of butter (1 stick) softened shopping list
-1/4 cup of milk shopping list
-1 t vanilla shopping list
-1 T lemon zest (the rind of a lemon) shopping list
-1 T lemon juice (use 1 more T if necessary)

Then I started frosting my first cake.


Not too bad so far!!!

Then, TA DA!!!!


How's that? :) It's a bit uneven because I didn't trim the cake so it made the frosting uneven, but turned out better than I expected! It's a pretty moist cake, the syrup helped keep the cake moist. yayyerrr!!!